

Pages
Your first space
From an empty account to your first published documentation in just a few minutes.
Create space
In the Spaces overview, select the New Space button. In the dialog, enter:
Name (required field) – typically the customer or project name.
Description (optional) – a brief classification.
Brand color – accent color for map and portal, via preset or custom color value.
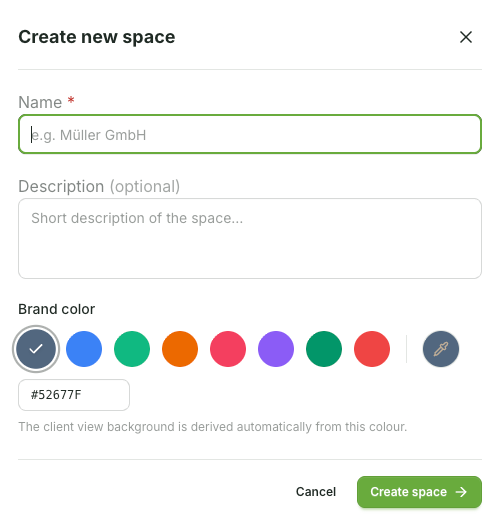
With Create Space, you go directly to the new space.
Create pages
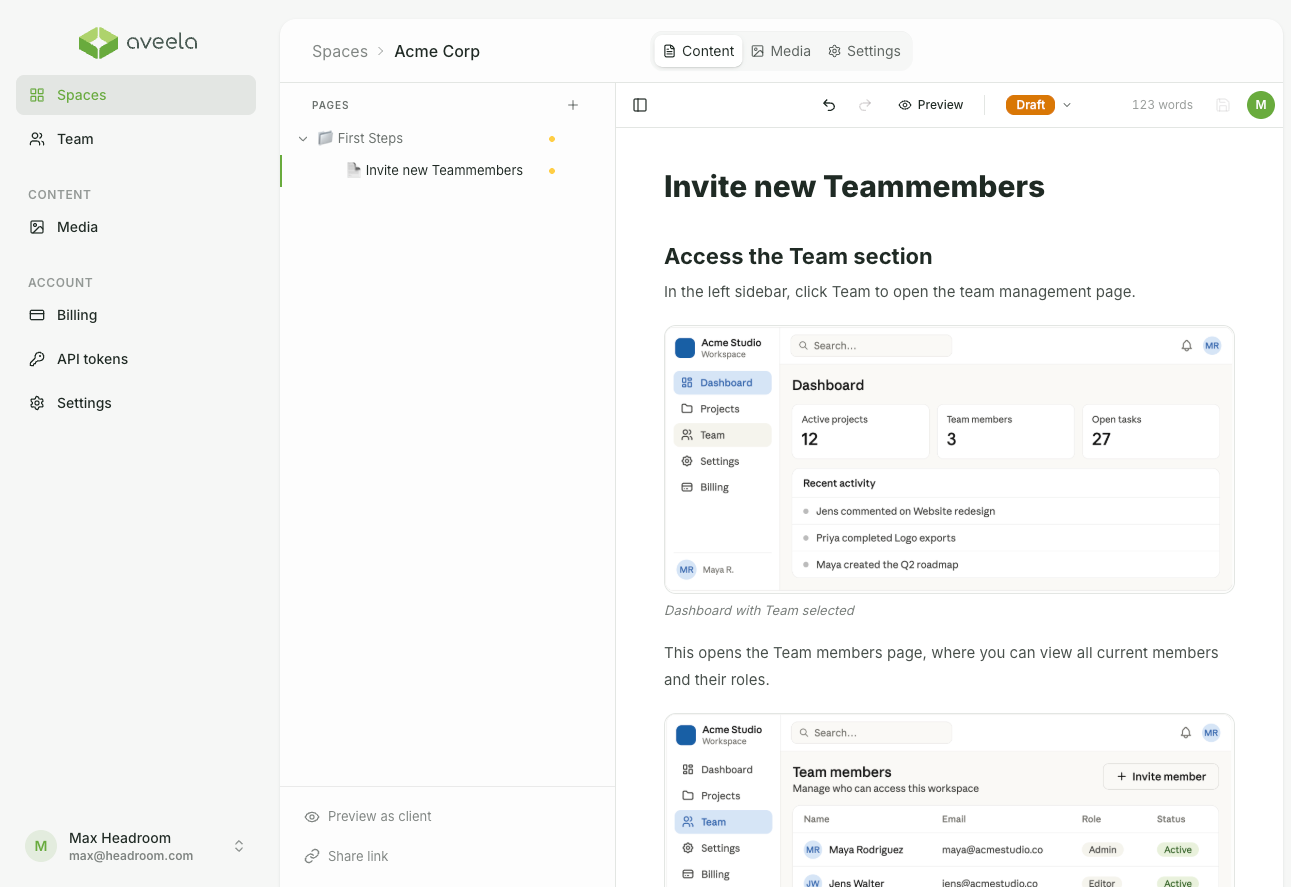
Each Space opens in its own tab Content with the editor. Use the page list on the left to create pages and subpages; in the main area, you can write and format your text. Your changes are saved automatically. The editor is covered in detail in the chapter Create content.
Publish
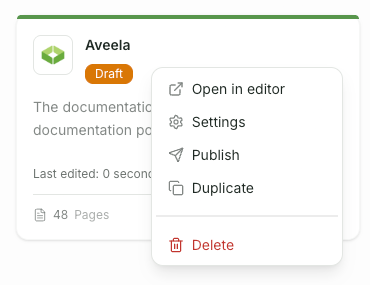
A new Space is initially a draft—indicated by the status badge on the Space card. Once the content is finalized, publish the Space via the ⋯ menu on the card. The status will change to Published.
Share
Release the Space afterward—either as a protected portal access for registered members or as a shareable link. Both methods are described in the chapter. Publish & Share.