

Pages
Insert images
You can insert images in three ways:
Use the Building Block menu (
/→ Image) to select an image from the media library.Drag & Drop – simply drag an image file directly onto the canvas.
Paste (Ctrl/Cmd + V) – e.g., a freshly captured screenshot from the clipboard.
If an image is inserted, a toolbar appears when you click on it:
Replace – swap with a different image
Crop – Define image section directly in Aveela
Alternative Text – Image Description for Accessibility (optionally suggested by AI upon request)
Delete
A caption can be added below it.
Size and automatic description
Resize: Drag the handle on the right edge of the image to adjust the width (up to the original size—images are never upscaled).
Automatic description: When inserting, Aveela can automatically fill in empty alt text and captions using AI, if desired.

Annotate images
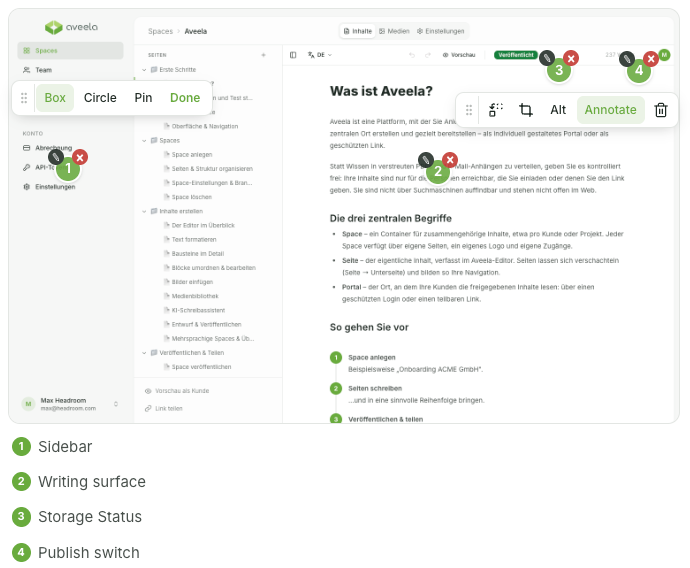
Screenshots can be annotated directly in Aveela—perfect for highlighting a button or area in a guide. Click "Mark" in the image toolbar; a small, movable tool palette will open with three tools:
Rectangle / Circle – draw a frame on the image. Use ✎ Edit to add a label if desired, which will appear directly on the shape.
Pin – inserts an auto-numbered marker with a click. Its description appears as a caption below the image; in the portal, your customers see it when hovering over the pin.
Drag existing markings to move them; resize rectangles and circles using the handles, and × deletes a marking. Click Done to exit marking mode.
The markings are part of the image: they are preserved when moving and scaling, and also appear in the published documentation.
Note:
Currently, images are the only supported media elements. The editor does not currently support other file attachments or embeds.